
September 15, 2026
Desktop Clock Widget: Setup, Customization, and Focus Tips
Learn how to add, customize, and troubleshoot a desktop clock widget on macOS, Windows, and Android, plus setup tips for Pretty Progress.
You’re halfway through a video call, a browser window is crowded with tabs, and Slack keeps adding notifications. You can check the time in the taskbar or menu bar, but that tiny glance often turns into a calendar search, a message reply, or another distraction. A well-placed desktop clock widget gives you a stable visual reference, so you can reorient yourself without leaving the task in front of you.
The useful question isn’t which widget looks most impressive. It’s whether the widget helps you understand what time it is, what comes next, or how long you’ve chosen to work without demanding attention. The sections below cover native setup paths for macOS, Windows, and Android, followed by a way to use Pretty Progress as a motivational countdown surface alongside a regular clock.
A widget earns its place when it stays quiet. If it adds visual noise, hides behind windows, or requires frequent maintenance, it has stopped supporting focus.
Table of Contents
- Why a Desktop Clock Widget Still Matters in 2026
- Adding a Clock Widget on macOS
- Adding a Clock Widget on Windows
- Adding a Clock Widget on Android
- Turning Pretty Progress into a Clock-Like Widget
- Designing for Glanceability and Focus
- Troubleshooting and Next Steps
Why a Desktop Clock Widget Still Matters in 2026
A clock can act as a focus anchor. It gives your eyes a fixed point for checking the present moment, which is useful when you’re time-blocking work, preparing for a call, or deciding whether to start another task before a deadline. Calendar alerts still matter, but alerts are easy to dismiss. A persistent clock remains available without interrupting you.
This idea has older roots than today’s minimalist desktops. Microsoft’s Windows Sidebar first appeared in a Longhorn build around September 2002, was rebuilt for Windows Vista in the second half of 2005, and eventually disappeared when the Desktop Gadgets platform was discontinued in Windows 8. The built-in gadget collection included a Clock gadget, making the desktop clock widget a familiar part of the Windows experience before Microsoft moved toward other interface models. Microsoft’s Desktop Gadgets history provides the broader timeline.
Apple created a similar habit on the Mac through Dashboard. Dashboard launched in 2005 with four default widgets, including Clock, Calculator, Weather, and Calendar, and Apple removed Dashboard in 2019 after a 14-year run as part of the Mac experience. This Mac widget history shows how clock-style utilities became familiar on both major desktop platforms.
Practical rule: A clock should answer one question instantly. If you need to click, search, or decode it, simplify the design.
The setup choices differ by platform. macOS offers desktop widgets through its widget gallery, Windows separates its widgets board from a persistent desktop surface, and Android gives you flexible home and lock screen placement. Pretty Progress adds a different layer, a countdown that communicates progress toward a selected moment rather than displaying the current time. In every case, the aim is the same: one glance, one useful piece of information, no detour.
Adding a Clock Widget on macOS
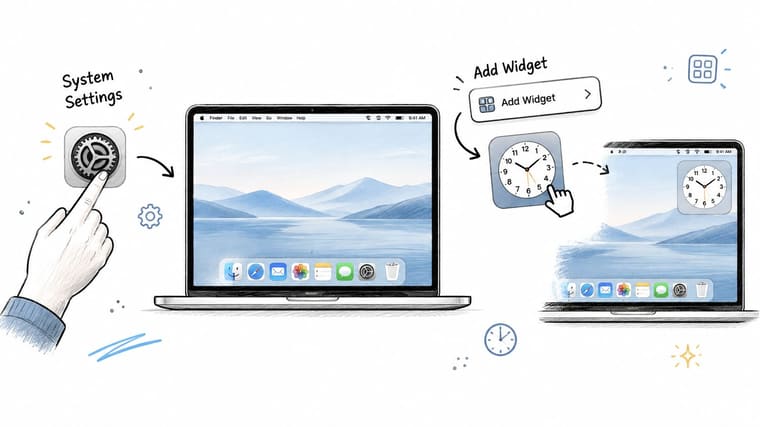
On recent macOS versions, desktop widgets are managed through System Settings and the widget gallery. Start by opening System Settings, then check the desktop widget permissions so widgets are allowed to appear on the wallpaper. You can access the gallery from Notification Center or by right-clicking an open area of the desktop and choosing the widget option.
Search for Clock in the gallery. Drag the widget onto the desktop, or select Add Widget if that option appears. macOS offers different sizes, so use a compact version when you only need the time and a larger version when you want more context. Resize it by dragging the corner handle until the layout fits your workspace.
Customize the clock surface
Right-click the placed widget and choose its edit option. Depending on the available view, you can switch between a local or world clock presentation, add cities, choose an analog or digital face, and decide whether seconds should appear. A world clock is useful when you work with people in other time zones, while a local digital clock is usually faster to scan during focused work.
macOS widgets sit above the wallpaper but below open windows. That makes placement important. Put the clock in an upper corner that remains visible beside your usual application, rather than placing it under a browser or a maximized editor.
A small clock beside your calendar can be more useful than a large dashboard. Pairing Clock with Calendar lets you read the current time and your next agenda item without opening another panel.
You can also stack two clock widgets when the two locations serve different purposes, such as local time and a collaborator’s city. For a more goal-oriented desktop surface, see this guide to Mac desktop widgets, then keep the number of visible elements deliberately small.
Adding a Clock Widget on Windows
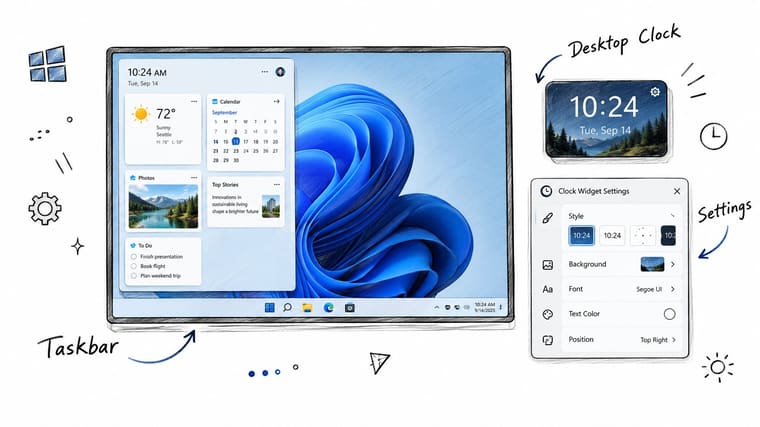
Windows 11 includes a Widgets board that opens from the taskbar, but that board isn’t the same as a clock pinned to the desktop wallpaper. It’s a useful panel for supported information, yet it disappears when you close it. If you want time visible without opening a board, start with the built-in taskbar tools.
Right-click the taskbar clock and choose Adjust date and time. Check that the local time zone and automatic time settings are correct. For colleagues or clients in other regions, open the Additional Clocks tab and enable extra clocks with their selected time zones. They’ll appear through the clock flyout rather than as permanent desktop objects.
Windows’ desktop widget history helps explain the gap. The old Windows Sidebar and Desktop Gadgets platform included a Clock gadget, but Microsoft later discontinued that platform. Today, a persistent desktop clock generally requires a third-party tool such as Digital Clock, ClocX, or Rainmeter with a simple clock skin.
Pick the least complicated option
Choose a lightweight digital clock if you want a clean readout with control over size and font. Choose ClocX if you prefer an analog-style clock. Rainmeter offers deeper control through skins, but it can turn a simple setup into a customization project.
Place the widget in the upper-right area of the primary screen, while keeping it clear of taskbar icons and common window controls. Use strong contrast, especially if your wallpaper changes. If the clock shares space with your work windows, learning a step-by-step Snap Layouts tutorial can help you arrange applications without covering the widget.
Keep the first configuration minimal. Add one clock, test it during normal work, and only then consider a second time zone or decorative skin.
Adding a Clock Widget on Android
Android makes the basic clock setup quick. Long-press an empty area of the home screen, tap Widgets, and find the built-in Analog Clock or Digital Clock. Press and hold the chosen widget, drag it to an open area, and release it.
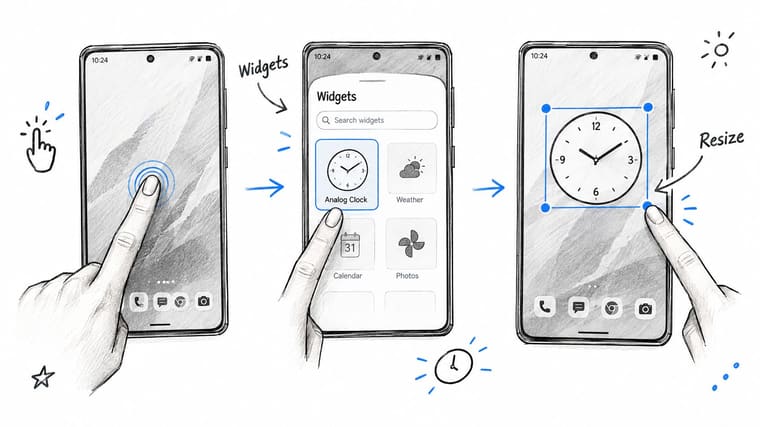
If your launcher supports resizing, long-press the placed widget and drag its corner handles. A smaller version works well on a sparse home screen, while a larger version can display more information or remain readable from a distance. Launcher behavior varies between Pixel, Galaxy, and stock Launcher3 environments, so the wording of each menu may differ even though the basic gesture is similar.
Adjust style and location
Long-press the widget again to look for settings such as appearance, transparency, skin, city, or time zone. Some dual-city displays may request location access. Grant it only if the feature needs your location, and otherwise select a city manually when the option is available.
Pixel and Samsung devices may also support clock placement on the lock screen. Open the lock screen customization menu, choose the clock area, and select the available style. Material You may tint the clock to coordinate with the wallpaper, which can look cohesive, but check contrast before accepting the default color.
If you use Android for spoken notes while working, Android transcription software can reduce the need to switch between typing and voice input. Keep that tool separate from the clock’s job, so each surface has a clear purpose.
Watch the clock for a moment after placing it. Confirm that the displayed time is correct, then rotate the device if rotation is enabled and check that the widget remains readable.
Turning Pretty Progress into a Clock-Like Widget
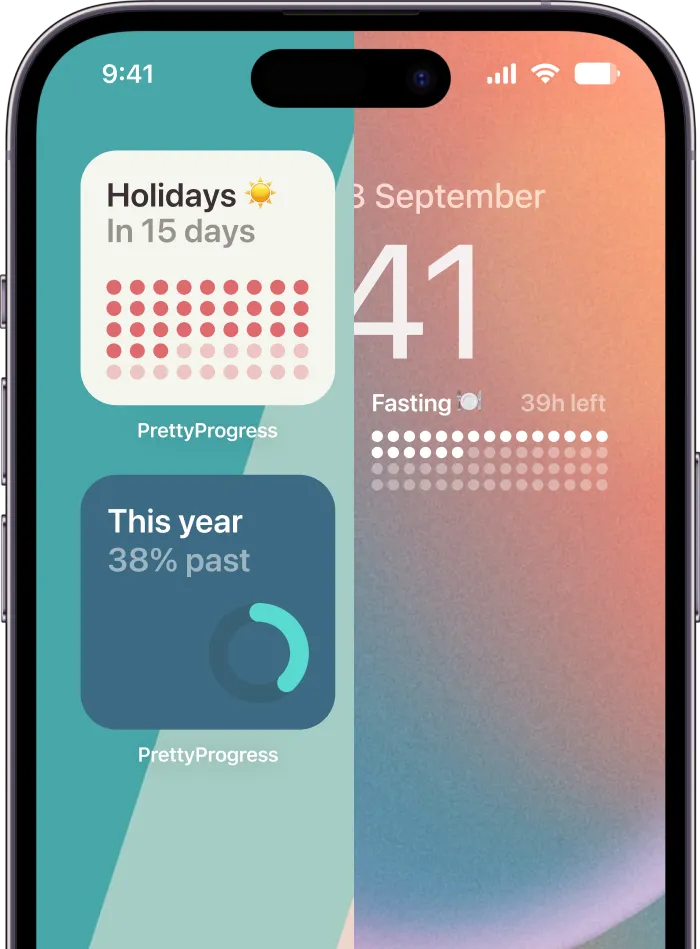
A regular clock tells you the current time. A countdown tells you how much progress remains until a chosen moment. Pretty Progress uses the second approach, creating a glanceable surface for deadlines, launches, study targets, or personal milestones.
Install the app from the Play Store or App Store, then add its widget to your home screen or supported desktop surface. Create one countdown with a clear label, such as Days Until Launch, Exam Week, or Next Review. Choose the end date and time carefully, because the usefulness of the display depends on that target being accurate.

Make the countdown readable
Adjust the ring thickness, color, and background transparency until the remaining progress is visible at a normal glance. A bold ring can communicate urgency, while a thinner ring may feel calmer for a long-term goal. The label should explain the countdown without forcing you to remember what the number means.
Avoid adding several countdowns just because the app permits them. One deadline widget beside a native clock can provide both present-time awareness and forward momentum. Add another only when it represents a separate decision, such as a distinct work milestone rather than another description of the same deadline.
You can edit dates from the Today view without removing the widget. If you use the app across devices, a linked account can keep countdowns synchronized so the selected dates remain consistent wherever the widget appears. For layout ideas that treat a timer as part of the home screen rather than a separate app, explore the home screen timer guide.
Designing for Glanceability and Focus
A clock widget should be glanceable, not attention-seeking. A usability study of awareness widgets in a shared workspace found that more glanceable visualizations were easier to interpret and weren’t distracting. Participants judged the “radar” and “mini” displays easier to read than scrollbar-style views, and the more informative variants received more positive rankings. The usability study supports a practical design choice: prioritize compact, high-contrast state changes over visual novelty.
That principle translates well to a desktop clock widget. Put it in the upper third of the primary screen, preferably in an upper corner opposite the area where your active application places important controls. Don’t place it behind a maximized window and don’t make it so large that it becomes a second application panel.
Build a quiet visual hierarchy
Use one native clock, one countdown, and, if needed, one task surface. This arrangement gives you three different kinds of information without creating a wall of competing labels. For ADHD-friendly setups, the restraint matters because every extra badge, animation, and color creates another possible interruption.
A single-purpose layout also reduces decisions. A comparative widget-performance study found that interaction time increased as the number of options increased, while the preferred control depended on whether choices were mutually exclusive. The comparative widget study points to the same design lesson for clocks: expose only the actions you use often and move advanced choices into a separate settings panel.
Use a monochrome theme when pairing a native clock with a Pretty Progress countdown. Matching colors and static surfaces make the countdown feel like part of the time display instead of a notification. Disable notification badges and animated clock faces if they pull your eyes away from the task.
Focus rule: The widget should reinforce a routine, not ask you to manage it.
For time-boxing, choose a visible 25-minute countdown for a focused work interval and a longer 90-minute timer for a deep-work block. These values are practical examples of how to structure a session, not universal requirements. Use whichever interval fits the work and your energy.
Run a weekly widget audit
Check the following during a normal work session:
- Font size: Can you read the time without leaning toward the screen?
- Contrast: Do the numerals remain visible over both light and dark wallpaper?
- Spacing: Is there enough empty space around the widget to separate it from other information?
- Orientation: Does the layout remain useful on the monitor or device position where you work?
- Motion: Are animations helping you understand progress, or attracting attention?
- Purpose: Can you name the decision this widget helps you make?
A general UI design guide can help if you’re building a more elaborate personal dashboard, but a clock rarely needs elaborate treatment. Audit the arrangement weekly and remove anything you haven’t consciously used during the past seven days. A calm desktop is usually the result of subtraction.
For a practical countdown workflow, see the focus time tracker guide, then test one layout change at a time.
Troubleshooting and Next Steps
Most clock widget problems come from placement, permissions, or a time-zone setting rather than a broken clock face. Start with the smallest diagnostic step: check the system time, confirm the selected time zone, and see whether the widget updates after opening its host app.
On macOS, a widget may disappear after an update or a desktop setting change. Remove it and add it again from the widget gallery. If a clock shows the wrong city, edit its location instead of creating a new widget. If the text blends into the wallpaper, choose a less transparent style or move the widget to a quieter area.
Windows problems usually fall into two groups. The Widgets board may fail to load, but that doesn’t affect the taskbar clock or a separate desktop tool. A wrong additional clock usually points back to the main Windows time zone, so check automatic time and time-zone settings before changing the extra clock.
Android widgets can revert after a reboot, especially when a launcher or battery setting restricts background activity. Re-add the widget, check the launcher’s battery permissions, and confirm location access if the widget uses automatic city selection. A frozen time display often resolves after restarting the launcher or device.
| Platform | Common Problem | Quick Fix |
|---|---|---|
| macOS | Widget disappears after an update | Remove it, reopen the widget gallery, and add it again |
| macOS | Text vanishes over wallpaper | Reduce transparency or move the widget to a plain area |
| Windows | Widgets board fails to load | Restart the widget host or use the taskbar clock instead |
| Windows | Additional clock shows the wrong time | Verify the main time zone and automatic time settings |
| Android | Widget resets after reboot | Re-add it and review launcher battery restrictions |
| Android | Dual-city display is incorrect | Check location permission or select the city manually |
| Pretty Progress | Countdown doesn’t update | Check the target date, refresh the app, and reinstall if needed |
Pretty Progress countdowns also depend on the target date and the account or device state used to maintain them. If the remaining value looks wrong, open the event in the app, verify its end time, refresh the widget, and reinstall only after those checks fail.
Escalate when the issue survives a reboot, re-adding the widget, and a verified time-zone setting. Otherwise, make one change at a time. Try a smaller clock today, move it tomorrow, and add a countdown only after the basic time display feels calm.
Pretty Progress gives you customizable countdown and progress widgets for turning deadlines, goals, and time-boxed work into glanceable reminders. Visit Pretty Progress to add a focused countdown beside your clock and build a quieter time-aware setup.