
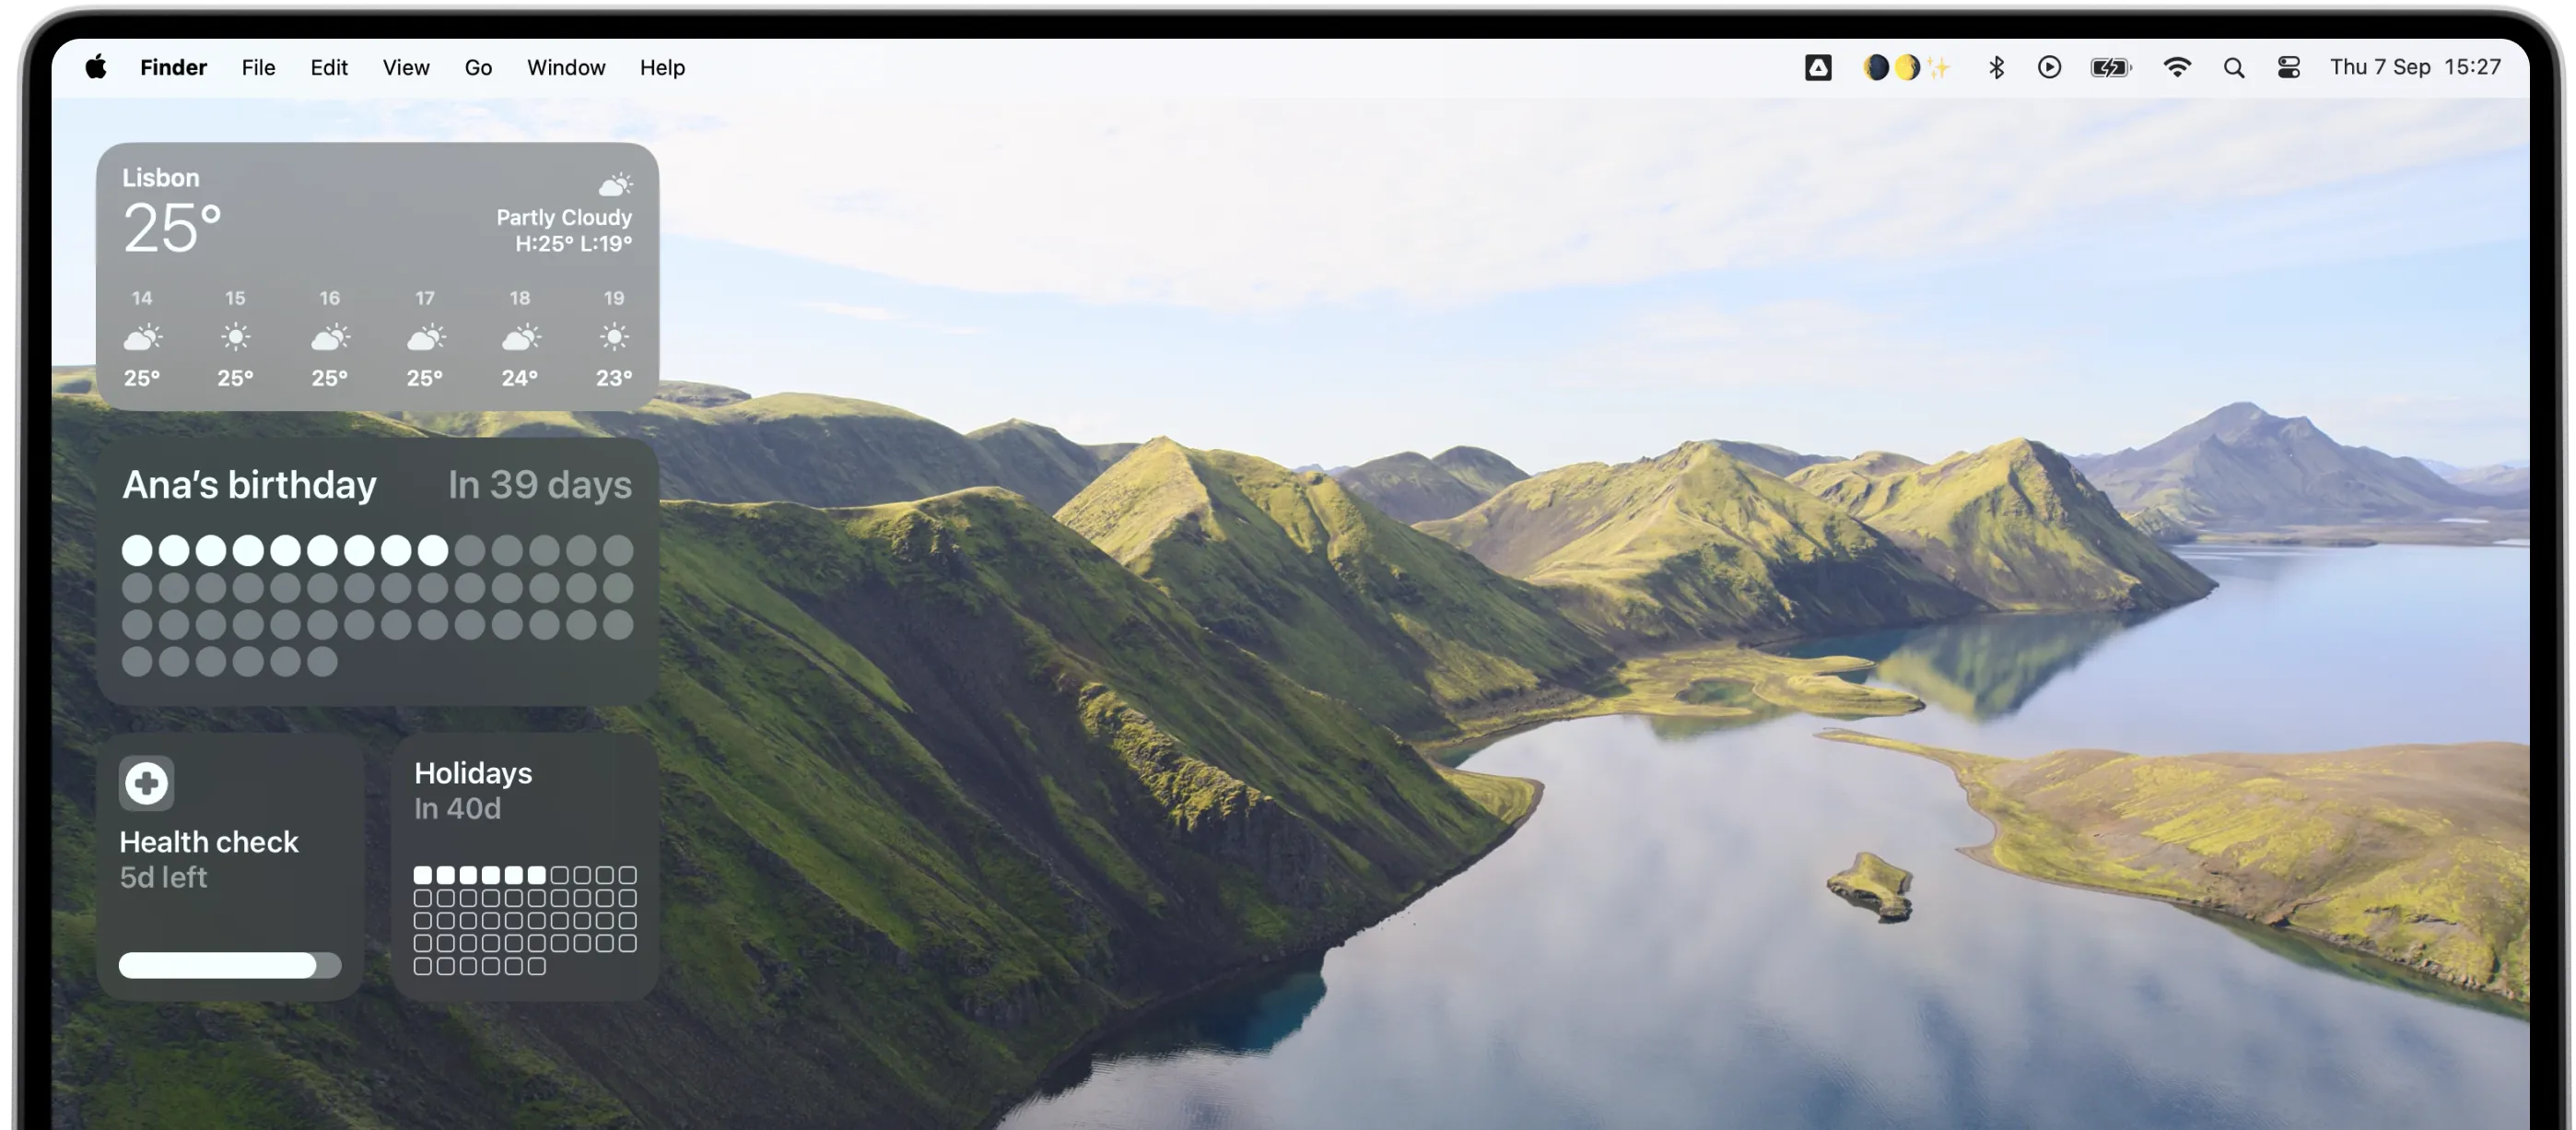
Watch the video guide
STEP 1
Create or customize your countdown widget in Pretty Progress.
1
Open Pretty Progress.
2
Click the (+) button to create a new countdown. You can also select and edit an existing countdown or duplicate one from the Library screen.
3
Click the date selector and choose the type of progress you want to create: “Countdown”, “Count up”, or “Timer”.
4
Select the starting date. The default starting date is the date when you create the countdown.
5
For a countdown, enter the final date or deadline. A count up can be created without an end date. For a timer, select how much time you want to count.
6
Optionally choose whether the countdown or timer repeats, set its frequency, and add personal notes.
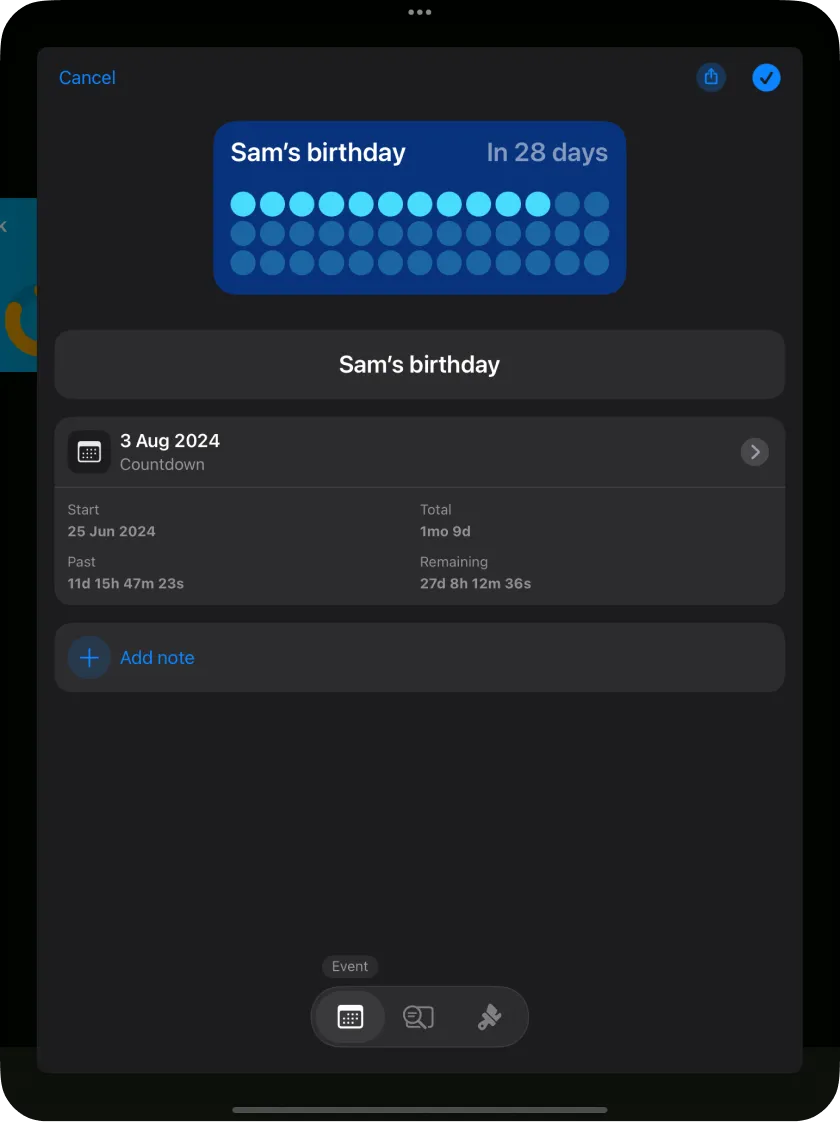
7
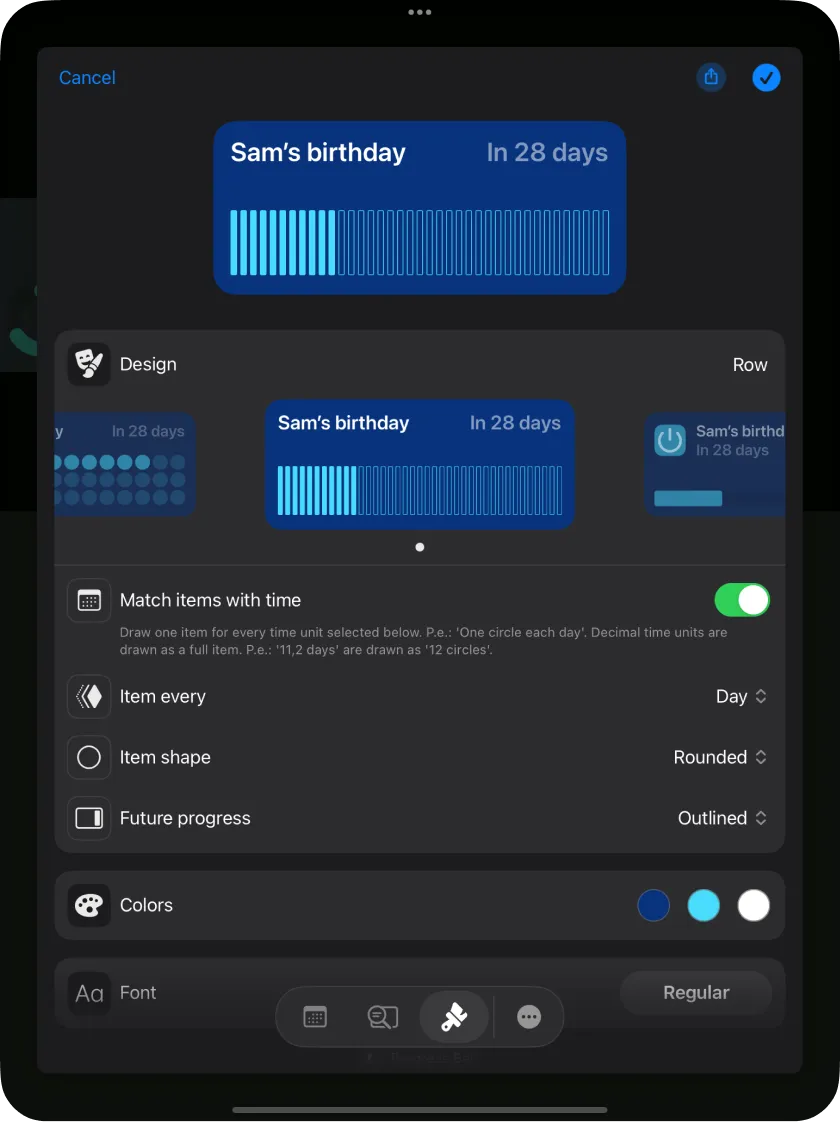
In the second tab of the bottom menu, choose how time is displayed: a single unit, several units, or a percentage.
8
You can also choose whether to show an accessory indicator to make the passage of time easier to understand.
9
In the third tab, personalize the countdown using the available designs. Each design has different customization options.
10
When you are happy with the result, click the checkmark button to save the event.
11
Your countdown will appear on the Pretty Progress Home Screen with your other countdowns.
STEP 2
Add your countdown widget to the Mac desktop
1
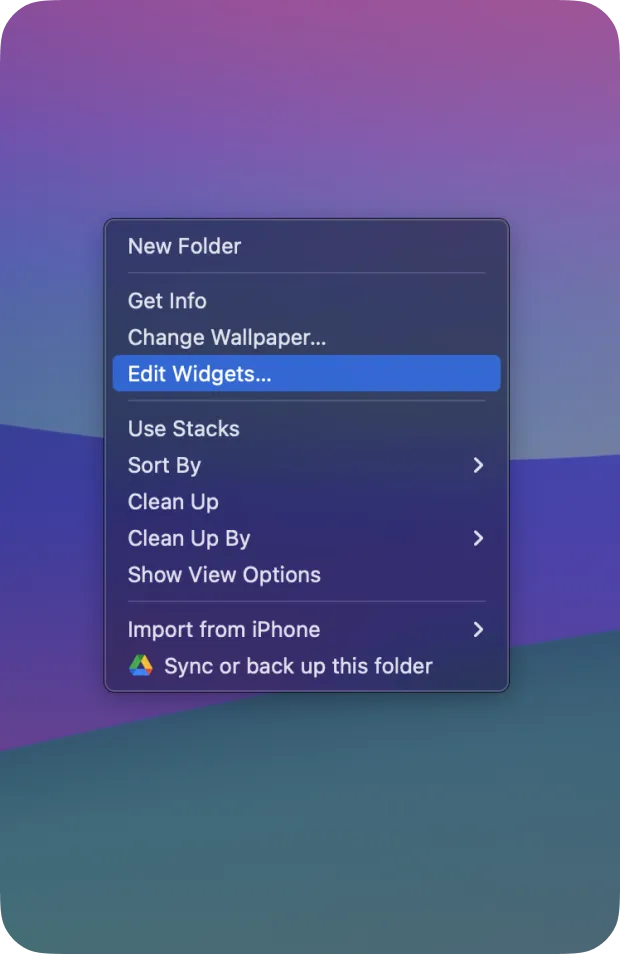
Right-click anywhere on the desktop wallpaper.
2
Choose “Edit Widgets…” from the shortcut menu.
3
Find Pretty Progress by scrolling or using the search field.
4
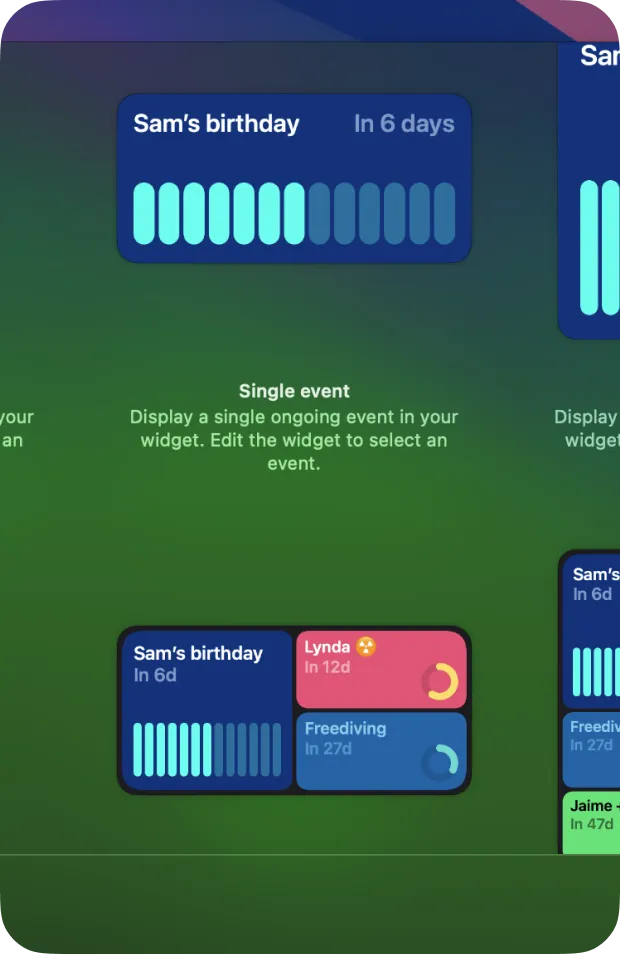
The available widgets appear on the right. You can use Pretty Progress for Mac or Pretty Progress for iOS.
5
Click the (+) button on a widget size, or drag the widget onto the desktop.
6
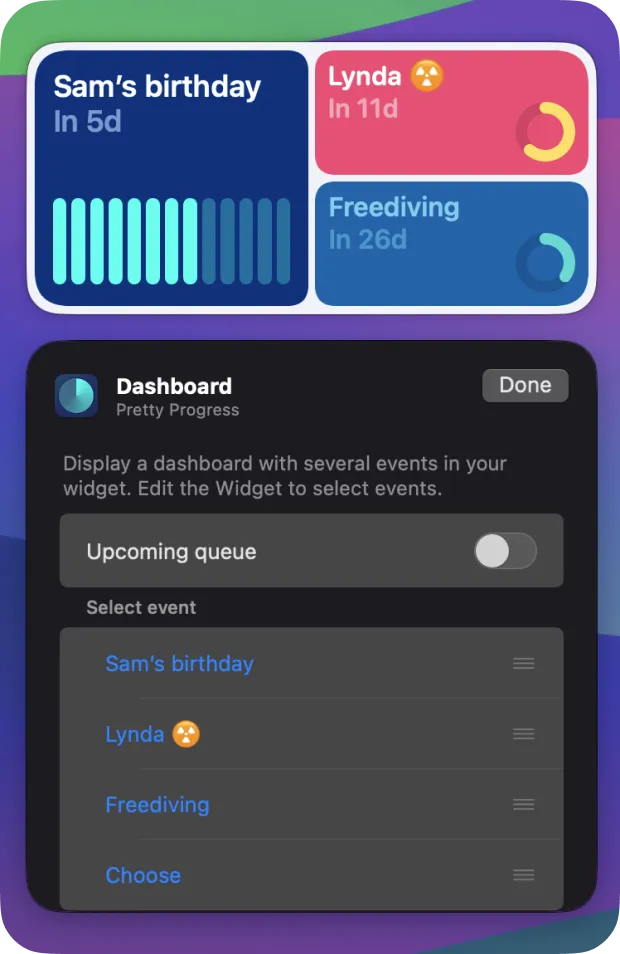
The event that finishes soonest appears by default.
7
Right-click the widget and choose “Edit Pretty Progress”, then select the countdown you want to show.
8
Rearrange desktop widgets at any time.
9
Click “Done” when you finish.
Download today for free
Track important moments with beautiful countdown and progress bar widgets.