June 13, 2026
Study Countdown Timer: Boost Your Focus & Grades
Master your study sessions with our intuitive study countdown timer. Stay focused, track your progress, and achieve your academic goals in 2026!
You’re probably here because study time keeps slipping away in one of two ways. Either you sit down with good intentions and keep “getting ready” instead of starting, or you do start, look up once, and realize you’ve drifted into messages, tabs, or reorganizing your notes for the third time.
A study countdown timer helps because it turns study time into something visible. Instead of telling yourself to “study chemistry tonight,” you give yourself one clear job: stay with this chapter until the timer ends. That’s a much easier promise to keep.
As an educator, I like timers because they reduce decision fatigue. As a tech-heavy study coach, I also like them because a good timer can live right on your screen, where it keeps nudging you back to the task without a lot of noise. That matters when your attention is shaky, your workload is big, or your brain resists vague goals.
Table of Contents
- Why Your Brain Loves a Study Countdown Timer
- Find Your Rhythm Before You Start the Clock
- Your Step-by-Step Guide to a Pretty Progress Timer
- Customize Your Widget for Motivation and Focus
- Advanced Timer Workflows for Different Study Needs
- Troubleshooting and Tips for Making the Habit Stick
Why Your Brain Loves a Study Countdown Timer
A big assignment often feels impossible because your brain can’t grab onto it. “Study for finals” is too large. “Work until this countdown ends” is concrete.
That’s why students often feel calmer the moment a timer starts. The task hasn’t changed, but the boundary has. You’re no longer facing an endless evening. You’re facing one visible block of effort.
A visual timer helps even more because you don’t have to keep checking the clock. You can glance once and know whether you’re near the beginning, middle, or end of the session. That lowers the urge to negotiate with yourself every few minutes.
A study countdown timer works best when it acts like an external structure, not a source of pressure.
This is especially useful if you deal with distractibility, procrastination, or the feeling that time disappears while you work. A visible countdown can take over part of the “executive function” job your brain is struggling to do in the moment.
If you’re also working on the bigger picture of attention, this guide on how to improve focus is worth reading alongside your timer setup. The timer gives you structure. Your environment and habits help you keep using it.
A timer won’t magically make boring material fun. But it does make the next step obvious, and that’s often enough to get moving.
Find Your Rhythm Before You Start the Clock
The most common timer mistake is choosing a format before choosing a study task. If the timer fights the work, you’ll stop trusting it.
Different tasks need different rhythms. Memorizing vocabulary, solving practice problems, outlining an essay, and reading a dense chapter do not ask the same thing from your attention.
The default rhythm most students recognize
The format most students know comes from the Pomodoro Technique. It uses 25-minute focus sessions followed by 5-minute breaks, and after four sessions, you take a longer break of 15 to 30 minutes. Done four times, that creates a 2-hour study block that many study timer tools use as the default model, as described in this Pomodoro study timer reference.
Why does this work so well for so many people?
- It lowers resistance: You only have to commit to one short block.
- It creates visible progress: Each finished round feels like a win.
- It protects your energy: Breaks are built in, so you don’t have to remember to stop.
- It works well for school tasks: Review, flashcards, worksheets, short reading, and practice sets fit neatly inside one cycle.
If you don’t know where to begin, begin there.
When time blocking fits better
Some students don’t need a timer for one task. They need a shape for the whole day.
Time blocking works well when your problem isn’t starting one session. It’s deciding what to do next, switching too often, or underestimating how long schoolwork takes. In that case, you place study blocks on your calendar first, then use a countdown inside those blocks.
A simple example:
- Morning block: Reading and notes
- Afternoon block: Problem sets
- Evening block: Review and quiz prep
Inside each block, you can still use a countdown. The point is that your timer now lives inside a larger plan.
When flowtime and deep work make more sense
Some tasks get worse when you interrupt them. Drafting an essay, coding a project, solving multi-step proofs, or building an exam outline often need a longer runway.
That’s where fixed short cycles can feel annoying. Some study advice now points students toward 90-minute blocks, flowtime, reverse Pomodoro, or break-focused timing instead of forcing one rhythm for everything, as discussed in this guide to different study timer techniques.
Practical rule: If stopping every few minutes breaks your concentration, your timer is too rigid for the task.
Flowtime is useful when you’re already locked in. Instead of interrupting yourself on a preset schedule, you let the work run until your attention naturally dips, then you take a break. A timer still helps here, but it acts more like a quiet tracker than a strict boss.
Here’s a simple comparison.
| Method | Best For | Structure |
|---|---|---|
| Pomodoro | Starting, review tasks, low motivation, mixed homework | Focus for 25 minutes, break for 5 minutes, repeat, then take a longer break after four rounds |
| Time Blocking | Planning a full study day, avoiding random task switching | Reserve chunks of your day for specific subjects or task types |
| Flowtime | Deep reading, writing, coding, complex problem solving | Work until focus drops, then break based on your actual concentration state |
A good rule of thumb:
- Use Pomodoro when you’re avoiding the task.
- Use time blocking when your day feels chaotic.
- Use flowtime or longer blocks when the task needs uninterrupted thinking.
The timer should match the work. Not the other way around.
Your Step-by-Step Guide to a Pretty Progress Timer
A study timer is only helpful if it’s easy to start and hard to ignore. That’s why setup matters. You want something visible, simple, and close to the way you already study.

Build your first study timer
If you’re using Pretty Progress, keep the first setup plain. Don’t try to make the perfect dashboard yet. Build one timer you’ll use today.
Start like this:
-
Open the app and create a new timer Pick a countdown or timer-style setup that clearly shows time remaining.
-
Name it after the specific task “Biology review” works better than “Study.” Specific labels reduce mental friction.
-
Choose one session length If you want a classic starting point, use 25 minutes for the focus block. If that feels too short or too long, adjust it to fit the task.
-
Save it with a simple design For your first version, use a clean layout with clear text and an obvious progress display.
The setup doesn’t need to be fancy. It needs to remove excuses.
Put the timer where you can actually see it
A timer hidden inside an app behaves like homework hidden in a backpack. You know it’s there, but it won’t guide you.
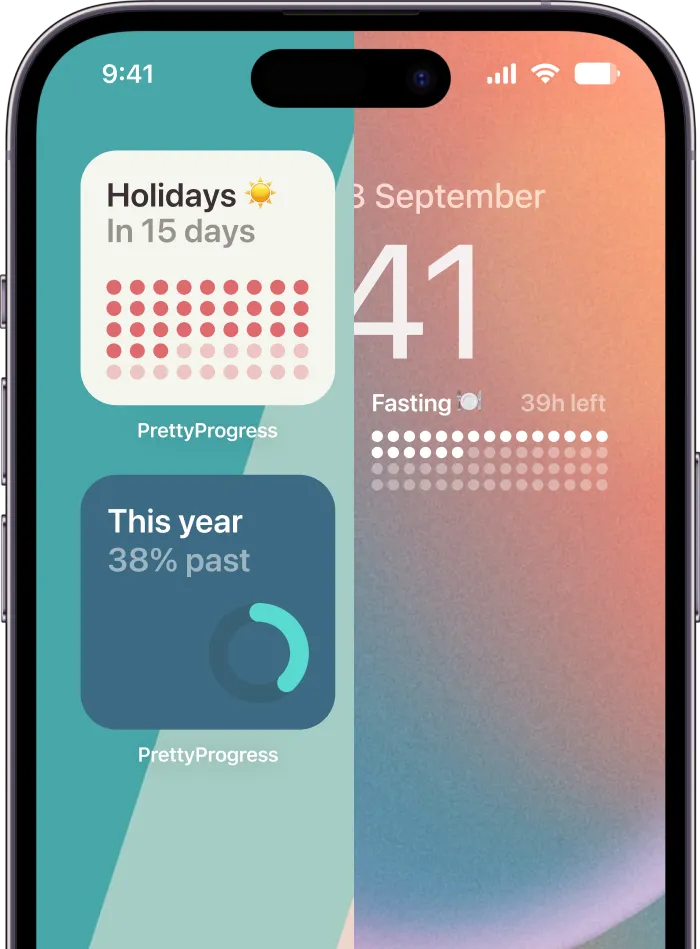
Add the timer as a Home Screen or Lock Screen widget so it becomes part of your visual field while you work. If you need a walkthrough for placement and visibility, the Pretty Progress Home Screen timer guide is the most useful next step.
Here’s the rule I give students: if you have to hunt for the timer, you won’t use the timer.
Try one of these placements:
- Home Screen first page: Best if you open your phone often between study tasks.
- Secondary study screen: Best if you want one screen dedicated to school tools.
- Lock Screen visibility: Best if you need frequent quick checks without opening apps fully.
Put the countdown in the place where your eyes already go when your focus starts slipping.
Use custom lengths when the task calls for it
A strong study timer should support both a default rhythm and adjustable intervals. Some timer tools explicitly support 15, 30, 45, or 60+ minute options because customization matters for usability, as noted in this Pomodoro timer customization reference.
That matters more than people think.
A rigid timer can fail for three common reasons:
- The task is too small: You only need a short sprint to finish review cards.
- The task is too deep: You’re in the middle of writing or problem solving and don’t want forced interruption.
- Your energy is off: Some days you can handle a longer session. Some days you need a smaller target.
Use these practical presets:
- Short resistance day: 15-minute timer
- Standard homework block: 25 or 30 minutes
- Reading or problem set session: 45 minutes
- Deep solo work: 60+ minutes if the task supports it
If you’re getting started, make one timer for “quick start” days and one for “deep work” days. That keeps your system flexible without making it messy.
Customize Your Widget for Motivation and Focus
The look of your timer changes how it feels to use. That isn’t cosmetic. It’s functional.
Some students study better with a screen that fades into the background. Others need a little visual energy to keep the task present. The mistake is assuming more style automatically means more motivation.

Choose calm before you choose style
For ADHD-sensitive or distraction-prone users, the safer default is a minimal design. Some timer advice and examples intentionally remove music and keep visuals simple because extra stimulation can become one more thing competing for attention, a concern discussed in this minimal versus highly styled timer discussion.
That’s why I suggest starting with the least stimulating version that still feels visible.
Use a calmer setup if you:
- Lose focus easily: Busy visuals pull your attention away from the task.
- Study in shared spaces: Loud or animated designs feel out of place in libraries and classrooms.
- Get “stuck” decorating tools: If you spend more time tweaking than studying, simpler is better.
If you like aesthetic screens, keep the style. Just make sure the widget still does its main job fast. One glance should tell you what you need to know.
For visual inspiration on cleaner and more expressive layouts, the Pretty Progress aesthetic widgets gallery can help you decide what fits your brain rather than just what looks good in isolation.
Three widget setups that work in real life
Here are three setups I’d recommend to students.
The low-noise setup
Use a minimal theme, high contrast text, and only the core time display. Turn off anything that adds interpretation work, such as extra decorative elements or information you don’t need during the session.
Best for:
- exam prep
- ADHD-sensitive studying
- library sessions
- late-night work when your brain is already tired
The motivation setup
Use a brighter color palette or a more expressive theme, but keep the layout simple. This can help if plain tools feel too sterile and you need a little emotional pull to start.
Best for:
- low-motivation homework
- repetitive review
- students who respond well to visual cues
The data-light setup
Show progress visually without overloading the screen with numbers. A clean bar or ring often works better than lots of tiny labels.
Best for:
- students who get anxious watching every minute
- long reading sessions
- keeping attention on the material instead of the countdown
Don’t ask, “Which design is prettiest?” Ask, “Which design helps me keep working?”
A useful troubleshooting move is to change only one setting at a time. If your current widget isn’t helping, don’t rebuild the whole thing. First simplify the colors. Then reduce the information shown. Then test it for a few sessions.
That way you can tell what improves focus.
Advanced Timer Workflows for Different Study Needs
Once one timer works, you can build something more useful than a single countdown. You can build a study system that matches different kinds of work.

Build a focus dashboard
A good dashboard keeps your active priorities visible without making your screen crowded.
Try assigning separate widgets or timers to:
- One current subject: such as math practice or essay drafting
- One deadline: such as an exam countdown
- One break timer: so rest doesn’t extend into avoidance
This works especially well for students balancing several courses. Instead of re-deciding what matters every time you check your phone, the priorities are already there.
A practical version might include one widget for today’s session, one for the next exam, and one for a recovery break. That’s enough structure to guide behavior without becoming clutter.
Use different timers for different kinds of thinking
Most timer advice falls short because it treats all studying like the same activity. It isn’t.
Some tasks need a push to begin. Others need protection from interruption.
Here are a few advanced setups I like:
-
Reverse Pomodoro Use the timer for the break, not the work. This is perfect if you tend to wander off once you stand up. Your work session can flow naturally, then the break timer tells you when to return.
-
Deep work block For complex writing, coding, or problem solving, use a longer uninterrupted timer. If you want help thinking through the classic short-cycle option first, this 25-minute focus timer is a useful comparison point.
-
Flowtime tracker Start a timer when you begin and let it run while you work. Stop when your concentration fades. The timer records reality instead of interrupting it.
-
Subject-specific intervals Reading-heavy tasks often tolerate longer blocks. Drill-based tasks may work better with shorter sessions and faster feedback.
If you want more ideas for flexible timer setups and interval-based workflows, the Pretty Progress timer interval guide is the most relevant reference for building multiple study patterns into one device.
One principle matters most: choose the timer style based on the cost of interruption. If stopping will help, use shorter cycles. If stopping will hurt, use a longer or looser timer.
Troubleshooting and Tips for Making the Habit Stick
The biggest failure point isn’t choosing a timer. It’s slowly stopping listening to it.
That usually happens when the timer is too ambitious, too noisy, or too disconnected from the way you study.

What to do when you start ignoring the timer
Shrink the goal first. Don’t increase pressure.
If 25 minutes feels impossible today, use a shorter start. A smaller block can rebuild trust with the tool. Once you complete a few easy wins, you can stretch again.
Try these fixes:
- Make the first session smaller: Start with a short block when resistance is high.
- Use the timer as data: If you quit early every time, the problem may be the session length, not your discipline.
- Reward consistency, not intensity: A repeatable routine beats one heroic study night.
Keep the timer visible and low-friction
The technical value of a visual countdown timer is perceptual time salience. A shrinking or moving visual cue helps you estimate remaining time at a glance, and effective focus timers prioritize silent operation and large, easy-to-read displays, with examples ranging from 3 to 90 minutes in visual timer design as shown in this visual countdown timer reference.
That’s why silent, glanceable timers work so well in study spaces. They keep time visible without interrupting thought.
If you want a broader work-focused perspective on timer habits, this productivity guide for professionals translates well to students too, especially if your studying already feels like project work.
The final mindset shift is simple. Your timer isn’t your boss. It’s feedback. If you keep dodging it, adjust the system until it fits your real attention span, your real environment, and your real tasks.
If you want a clean, visual way to keep study sessions visible on your devices, Pretty Progress lets you build countdown and timer widgets for Home and Lock Screens so your study plan stays in view instead of getting buried in apps.